Breakdown of Rock Paper Scissors Animated Process
The start of this project used what is called Pre-Productions, where you plan out what your video will end up being or giving a concept of the idea. I had to reshape (squash and stretch) the drawing from the pre-production so the size would be consistent throughout the animation. After I had planned out what my video would be, I opened up Anime Studio Pro to start the production phase, where the final video starts to come to life. I used Anime Studio Pro to place the drawings from the pre-production phase and made a quick and simple animation, that showed the anticipation of the next movement. The hands had to move with each other, and not get in the other hand’s way, so placement was necessary throughout the animation. I had to organize the frames to have each pose transition into each other cleaner and more realistic (anticipation; straight-ahead action and pose to pose).


I had to keep the movement fluid and give the animation variations of speed (Follow through and overlapping action) to continue making the frame transition to each other even cleaner. I had the final and first poses but I had to show what happened before and after (slow in slow out), so I set up frames before the ending frame to show what lead up to it, and how I would start another round of rock paper scissors, since it would A. be simple to do 1 round and B. its standard to do 3 rounds in rock paper scissors. I had to go back through my already existing frames to make sure they kept a natural movement throughout, and weren’t too stiff (arc). There wasn’t any necessary secondary movements to add in to add to the realism, but I did have to make sure everything was timed correctly so it didn’t feel too fast nor too slow. There was no need to add exaggeration in the first stages of the process, but I added minor effects to give the animation more of a dynamic feels so it wouldn’t be boring, and those effects added to the dimension (Solid drawing) so it wouldn’t look completely flat. I went through what I already had to check the appeal of the animation to see if it would look interesting enough to watch.
If you noticed I named each principal of animation some point in the early steps of the Production phase, that was done on purpose because that was what the early stages of production were all about, the 12 principles of animation. After I had finished with the base animation I took it into CapCut and gave it some audio, including music and a voice over. But the voiceover I had originally found was in Japanese so I had make an English version. I went into Audacity and recorded a quick sound effect for the movements, then recorded 2 different audios, for both players. Both audios were quiet and sounded a little similar, since they were both my voice at different pitches, so I used Audacity to edit the audios to change then pitches and make them louder so the sounded different from each other and gave them both a more dynamic feel.

Even with audios, the animation still felt boring so I took some effects from CapCut and put them in the animation to add more of an emotion, and placed a filter with some of those effects to add even more emotion and color so it wouldn’t be bland or boring. Music was added with the other audios to give more emotion and a better feel to the animation, so even when there wasn’t someone speaking you still heard some dramatic music playing to show that the “battle” still went on. But at the end I cut off the dramatic music and made it clear that player 1, or the viewer, lost the “battle” with a silly lose audio and some text, with a filter over the end to add to the emotion to say you lost. The final production, what came out in the end, was using everything I found and made and piecing it together to make a concise and dramatic video. If you actually want to see the process and the final product scroll through the rest of the page to see my process in action and how I got to the final product in the Post-Production phase.

Pre-Production
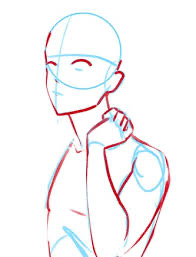
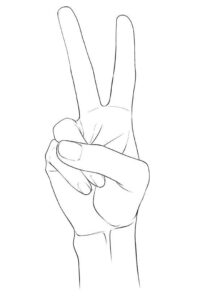
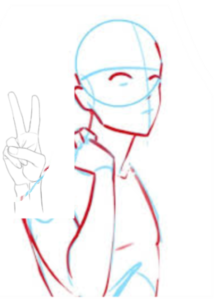
I started with this quick sketch I did, and took the hands I drew, and singled them out. I had to rotate the paper hand since It was originally the wrong hand.

Production
I took the singled out hands and started to animate them to make the basic idea of the final video. This is what it looks like with 0 effects and 0 sound.
Basic Effects
I needed to give the first video more dynamic so I gave the original video some effects in Anime Studio Pro. This is what it looks like with just it’s basic effects.
Audio
I put in a voice and some music into the last video. But the voice I found was in Japanese. All the audio heard was found on Capcut. I added some text to the end, and music, for a comedic effect early on.
Audio Fix
I took the last video and recorded 2 different voices. I took the girl’s voice, pitched it up, and made it louder. I took the males voice and did the same except I pitched it down. I used Audacity to record and changed the recordings of the new voices. I also added some sound effects, again using my own voice, and changed it to make it louder and better.
Big Effects
I took the last video and gave it more effects to make it more dramatic and dynamic of a video. I also added some filters to add to the dramatics. Everything, effect and filter wise, I used was found on CapCut. This is the final outcome (In English)
Switch Audio
I took the original audio, and the effects I already gave the video and recorded a male version of the Japanese voice for another voice to get a Japanese version of the final video.
